
Darling Duo Charms # 002
- carlene.brooks
- Aug 27, 2024
- 3 min read
Updated: Sep 19, 2024
Enjoy this adorable and FREE ITH embroidery pattern complimentary from myself to you
Stitch out Time: 13 min Approx. per charm

"Ivysaur - The Grass/Poison type Pokemon with a bud on it's back. To support its weight, Ivysaur's legs and trunk grow thick and strong. If it starts spending more time lying in the sunlight, it's a sign that the bud with bloom into a large flower soon"

To start out with ANY in the hoop embroidery patterns it is essential to first hoop your stabilizer. You can cut a size from a roll that will fit between both embroidery hoop frames. The frames should fit snuggly and not easily pop apart. You can adjust the frames via a small turn knob on the top or bottom. I prefer to only ever open and close the bottom one.
When creating using ITH (in the hoop) patterns it is also essential to only use tear away stabilizer. I prefer the lighter weight of 1.5 oz's so that it doesn't hurt my hands pulling it away later. If you use cut away it will be more frustrating and time consuming.
TIP: It is cheaper to buy a whole roll of stabilizer than pre cut sheets for certain hoop sizes. The roll will last a lot longer in you're considering the cost of materials.

2. Grab a light blue piece of minky fabric and lay it down covering the 4x4 embroidery hoop.
Your machine will tack this piece of minky to the hoop in a square. This method is known as "floating embroidery" since we do not actually hoop the fabric with the stabilizer in the hoop.
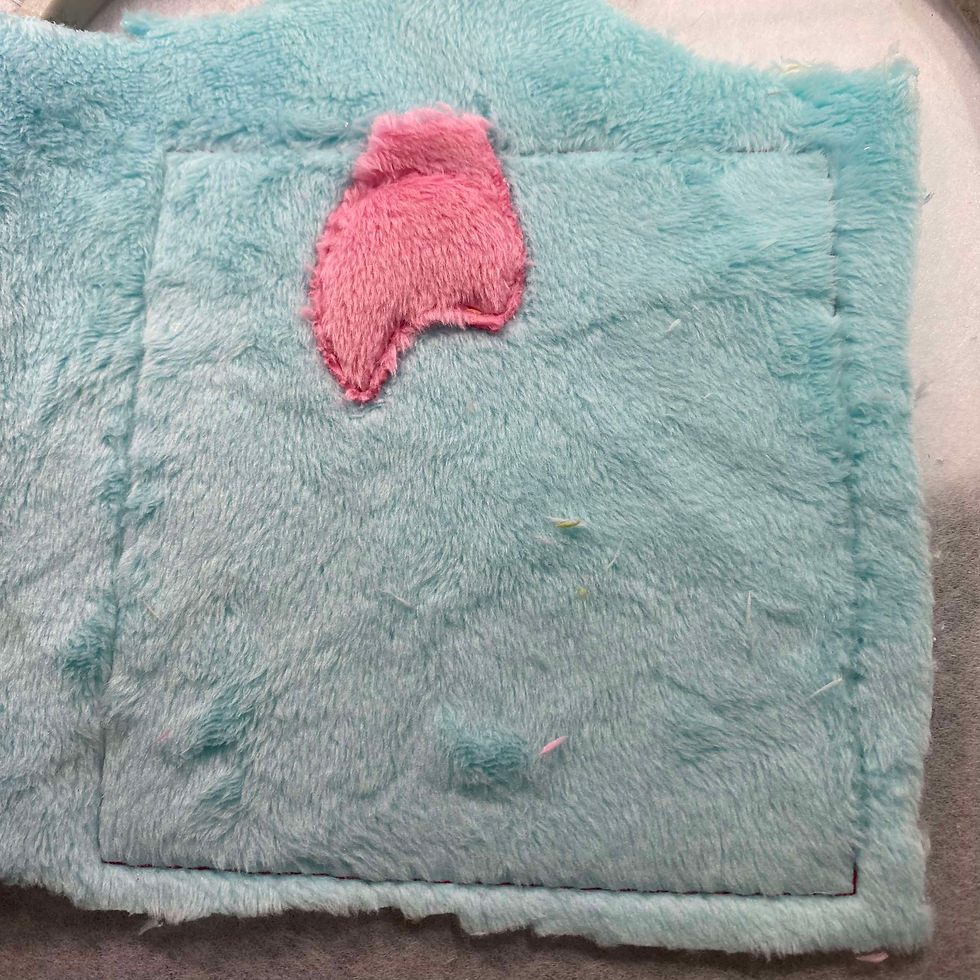
3. Lay down a second piece of scrap minky in a pink colour. Your machine will tack this down securely with a double stitch.
Remove hoop from the machine and use small embroidery scissors to carefully cut along the edge of the pink fabric close to the stitching.
Now cover whole design with water soluble stabilizer

4. Your machine will now stitch the following details in this order:
* Back Leaves - Teal Green
* Flower Bulb - Pink
* Cheeks/Mouth - Pink
*Teeth - White
* Mouth/Eyes - Black
* Spots - Dark Green
*Body/Back/Ear - Light Blue
**REMOVE WATER SOLUBLE STABILIZER ONCE FINISHED HERE. JUST PULL IT AWAY FROM THE DESIGN**

5. If you are making the Male variant he has the same stitch sequence as the Female however his whole design is flipped. This way he is mirrored from the Female variant.
He also is missing eye lashes and his spots are different.
To finish off the ITH charm - use a smaller width piece of ribbon folded in half. Place the loop down into the design as shown to the left.
Your machine will use a few stitches to tack this ribbon into place.

6. The final step is to cover the whole design with a lighter green piece of minky. Your machine will tack the whole design closed! Thus finishing the hooping.

7. Remove hoop from machine and pull design away from the stabilizer. Remove ALL excess stabilizer away from the back of the design. Carefully use sharp scissors and cut design out turning right side out.
I personally enjoy using hemostats to turn my keychains rightside out easily. I then use a flat headed screw driver to poke those harder to turn areas out from the inside.
Another tip is to use a "slicker" pet brush to brush your fur downwards after turning. It allows the fur fabric to sit in place properly

8. Once your design is turned right side out it is important to determine how you want the final design to look/feel for your charm.
These charms are smaller and as such likely not as compatible with regular poly-fill stuffing. I would recommend either leaving them as flat charms (unfilled) OR using Mochi stuffing. I opted to stuff mine softly with Mochi stuffing. Due to Mochi Stuffing's nature it does not balloon out the charms too much and remains very squishy inside the charms. Thus giving them a slightly plump look but not making them too round.
9. The last and final step it to take some hand sewing thread and ladder stitch the bottom closed of each charm!

10. Congratulations! You've just successfully finished the most adorable Darling Duo Charms! Feel free to add any type of keychain clasp you would like to the ribbons. These adorable designs are meant to be shared with someone special in your life! You can each keep one of the opposite with each other to remind yourselves how special you each are. Thanks for tagging along!
Want to check out a few more beginner friendly patterns? Here are a couple below that people tend to enjoy. You can check them out on my website under the patterns section! Thanks for being here with me and happy stitching!


Comments